Audi has long been known as a brand synonymous with luxury and performance. However, even the most well-crafted vehicles can experience mechanical issues.
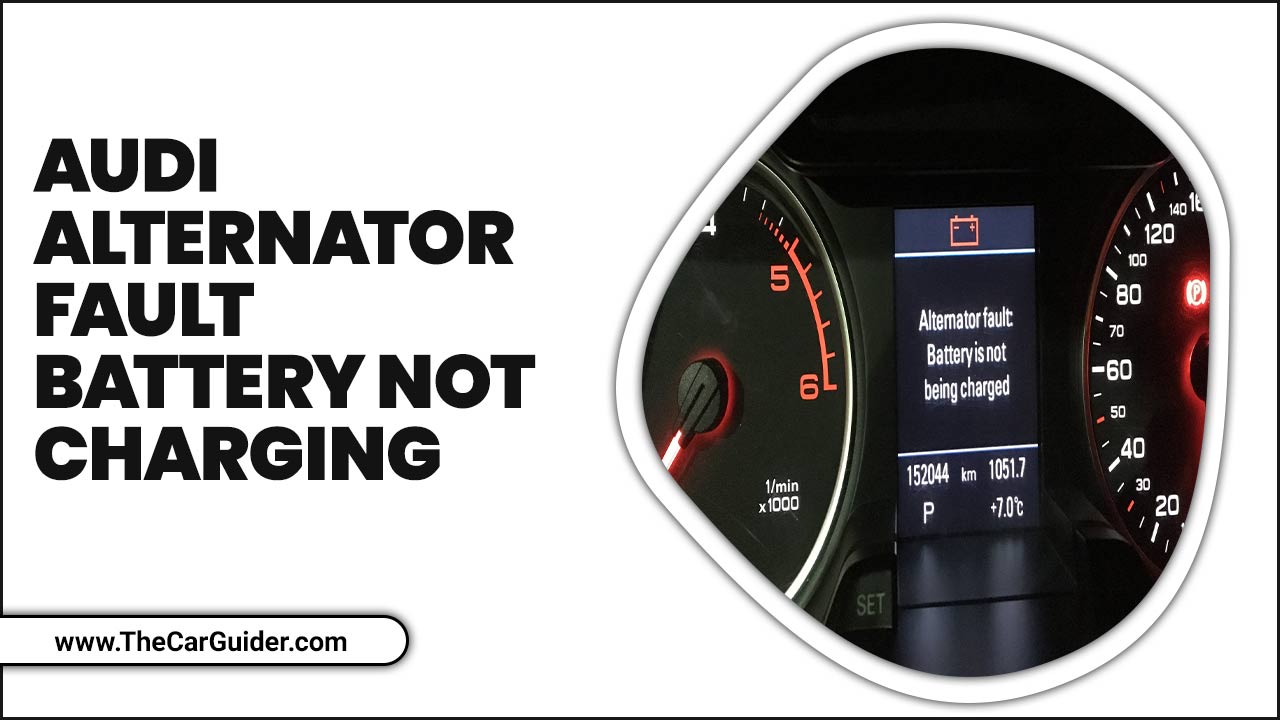
One of the most common problems reported by Audi owners is the “Alternator Fault Battery Not Charging” warning message. This can be a frustrating and concerning issue for drivers, as it can affect the performance and reliability of their vehicles.
Here, we will delve into the details of this warning message and explore audi “alternator fault battery not charging and solutions. We will also discuss the importance of addressing this issue promptly and provide tips on preventing it from occurring.
Whether you are a long-time Audi owner or considering purchasing one, understanding the “Alternator Fault Battery Not Charging” warning is crucial for maintaining the health of your vehicle.
Key Takeaways
- The “Alternator Fault Battery Not Charging” warning in Audi vehicles signals issues with the alternator or charging system.
- Common symptoms include dashboard lights, dimming lights, starting difficulties, and battery drain.
- Causes include faulty voltage regulators, damaged belts, wiring issues, or defective alternators.
- Prompt diagnosis and repair prevent further damage and ensure reliable performance.
- Regular maintenance, including checking belts, connections, and the battery, helps avoid alternator faults.
How An Alternator Works
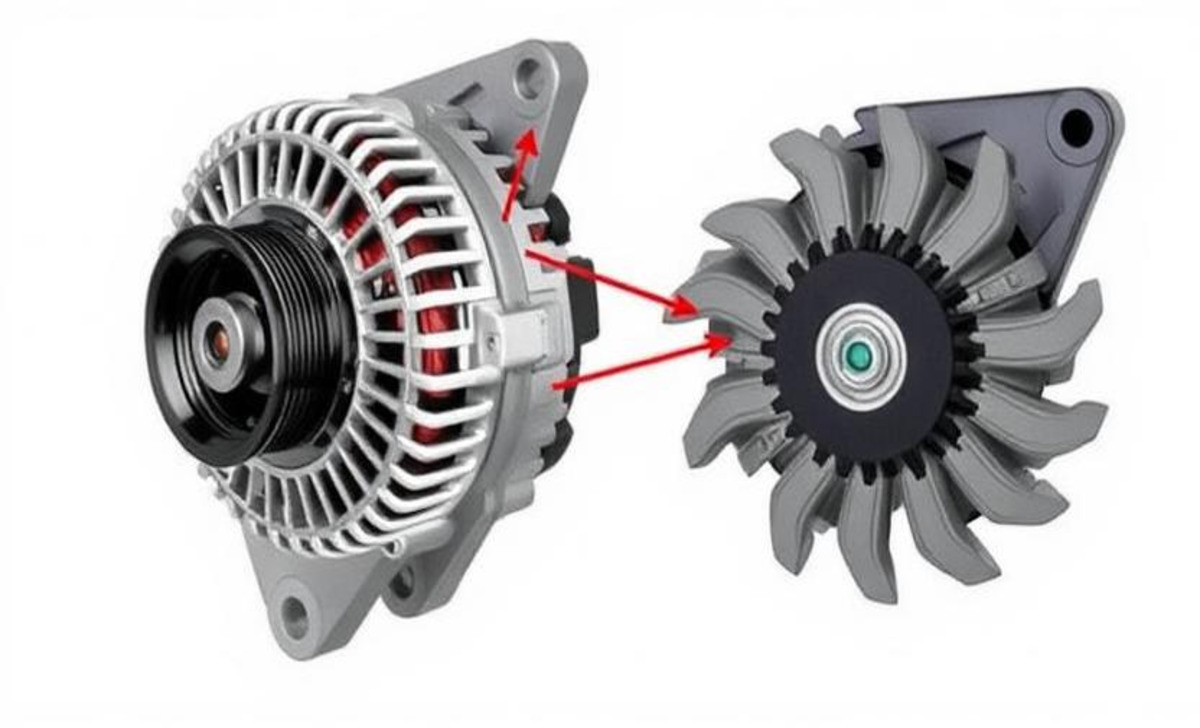
An alternator is an essential component of a vehicle’s electrical system. Its primary function is to convert mechanical energy into electrical energy, providing power to the vehicle’s battery and other electrical components.
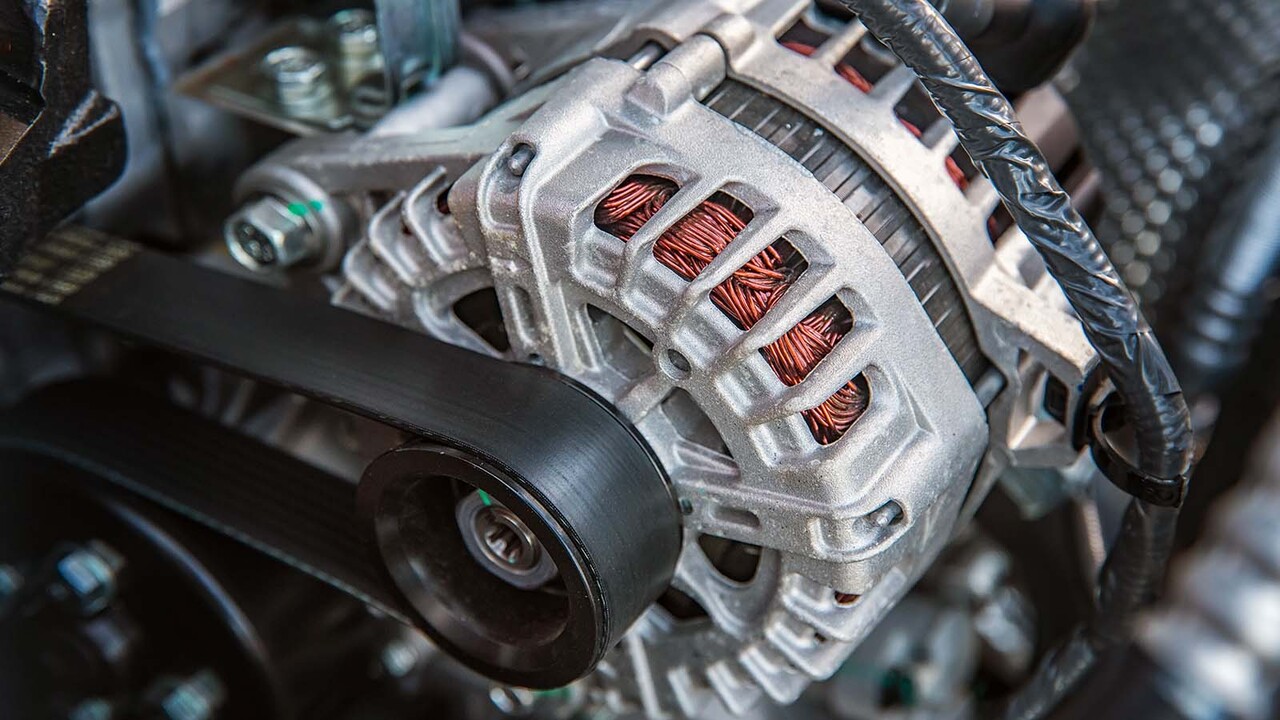
When the engine runs, the alternator uses a belt-driven pulley system to rotate a rotor inside a stator. The rotor comprises a series of wire coils wrapped around an iron core. As the rotor spins, it creates a magnetic field.
The stator, which surrounds the rotor, contains a set of stationary wire coils. As the rotor’s magnetic field passes through the stator’s coils, it induces an alternating current (AC) in the stator windings.
Diodes within the alternator convert This AC current into direct current (DC). The DC current charges the vehicle’s battery and powers the electrical systems while the engine is running.
Common Symptoms Of Alternator Fault
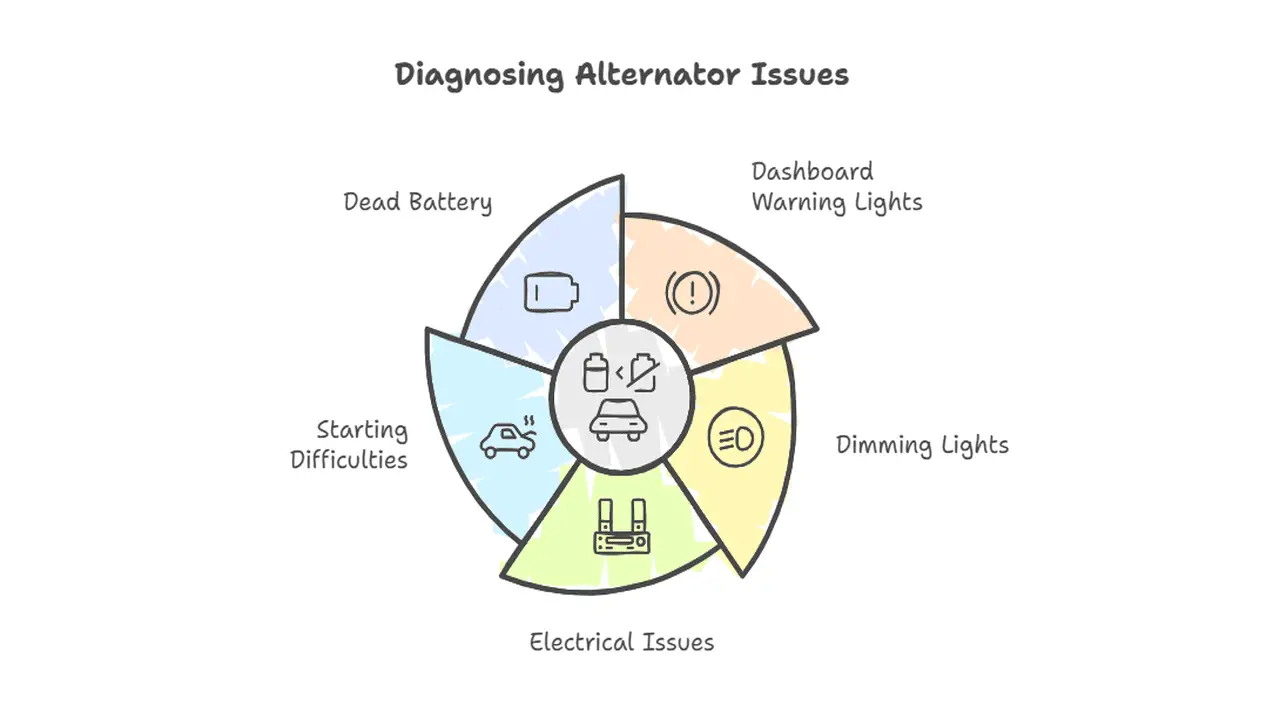
- Dashboard Warning Lights: Battery warning light or other indicators on the dashboard.
- Dimming Lights: Headlights and interior lights may dim due to insufficient power.
- Electrical Issues: Malfunctions in power windows, stereo, and other electronic components.
- Starting Difficulties: The engine may be hard to start or stall frequently.
- Dead Battery: The battery loses charge quickly or is unable to hold a charge
Causes Of An Alternator Fault In An Audi
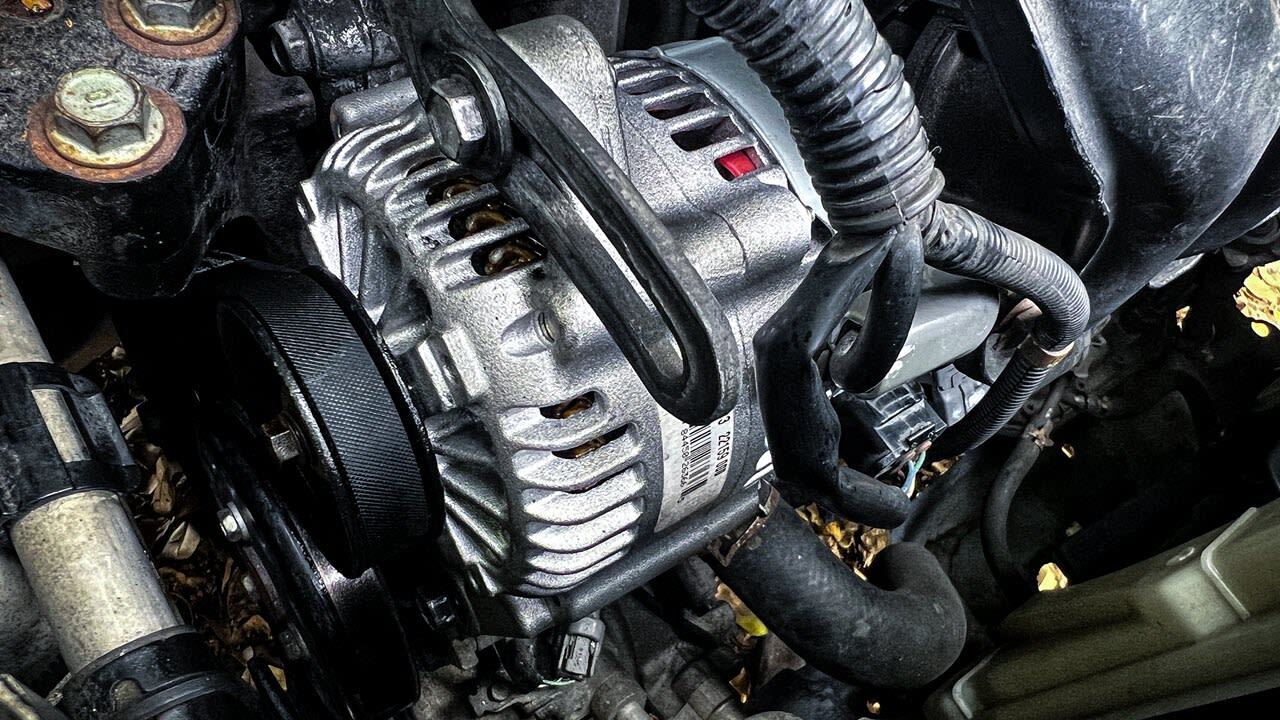
The causes of an alternator fault in an Audi can vary, but some common reasons include:
- Voltage Regulator Issues: The voltage regulator is responsible for controlling the output voltage of the alternator. If it malfunctions, it can result in overcharging or undercharging the battery.
- Wiring Problems: Any issues with the wiring connecting the alternator to the battery or other electrical components can cause a faulty connection and prevent the battery from charging correctly.
- Belt Tension Or Damage: A loose or damaged belt can lead to insufficient alternator rotation, resulting in reduced power generation and a failure to charge the battery adequately.
- Battery Issues: In some cases, a faulty or old battery can cause the alternator to work harder to charge it, leading to premature alternator failure.
- Faulty Alternator: The alternator may be defective or have worn-out components, leading to a failure in generating enough electrical power to charge the battery properly.
Diagnostic Techniques: Identifying The Alternator Fault

One such component that Audi owners should be familiar with is the alternator. The alternator plays a crucial role in the functioning of a vehicle’s electrical system, as it is responsible for generating the electricity needed to power the vehicle’s electrical components and recharge the battery.
When experiencing an “Alternator Fault Battery Not Charging” issue in your Audi, it is important to properly diagnose the problem to determine if the alternator is indeed at fault. Here are some diagnostic techniques to help identify the alternator fault:
- Visual Inspection: Start by visually inspecting the alternator and its components. Look for any signs of damage, loose connections, or worn-out belts. Ensure the alternator is securely mounted and all electrical connections are properly connected.
- Battery Test: Perform a battery test using a multimeter or battery tester. Check the battery voltage and determine if it is within the appropriate range. A low voltage reading could indicate a faulty alternator.
- Charging System Test: Use a voltmeter to check the charging system’s output voltage. Start the engine and connect the voltmeter to the battery terminals. The voltage reading should be between 13.8 to 14.4 volts.
Audi Alternator Fault Battery Not Charging – Troubleshooting And Repairing
The message audio “alternator fault battery not charging” is an indication that there may be an issue with the alternator or charging system in your Audi. The alternator generates electricity and charges the battery while the car runs.
When this message appears, it typically means that the alternator is not functioning properly and is not supplying enough power to charge the battery. It is important to address this issue promptly, as a faulty alternator can lead to a drained battery and potentially leave you stranded.
If you are experiencing this problem, having your Audi inspected by a qualified mechanic or visiting an authorized Audi service center is recommended. They will be able to diagnose the exact cause of the issue and provide the necessary repairs or replacements to remedy the problem.
Step 1: Checking The Battery
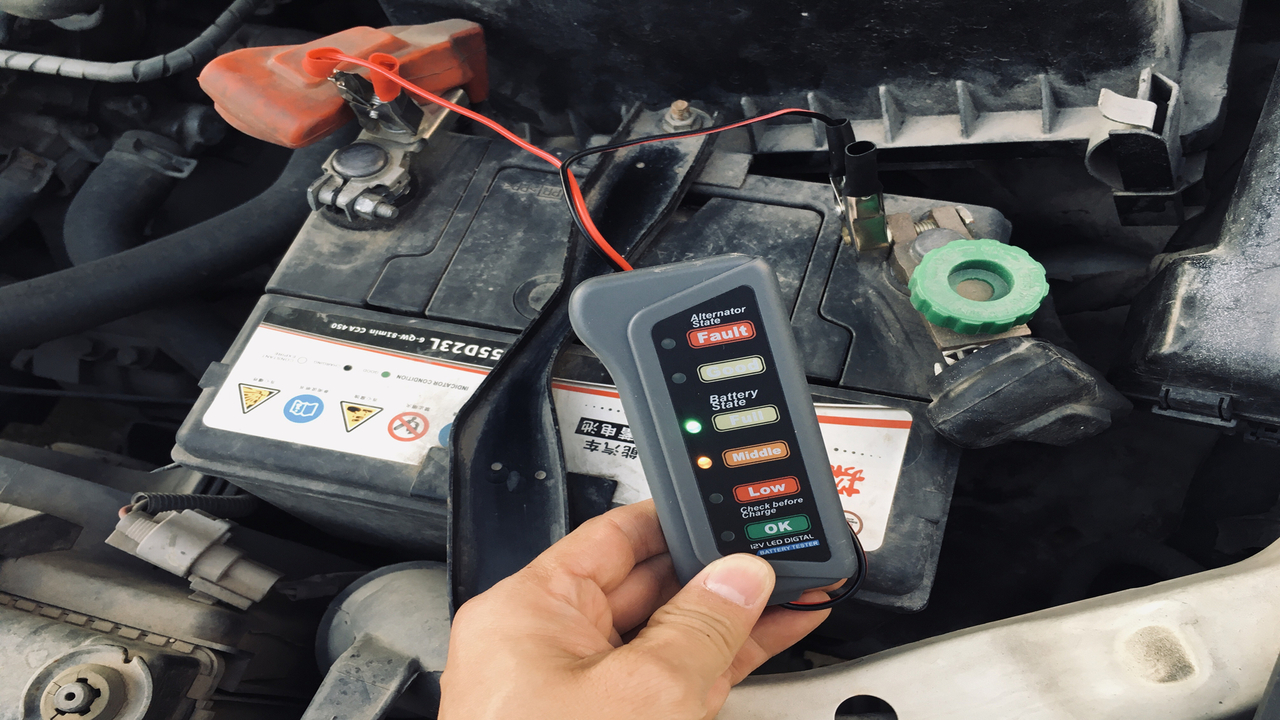
The battery is a crucial component of the electrical system and plays a significant role in the operation of the alternator. Begin by visually inspecting the battery for any signs of damage, such as corrosion on the terminals or a bulging or leaking case.
If any issues are found, replacing the battery before proceeding with further troubleshooting is recommended. Next, check the battery voltage using a multimeter. Connect the positive (red) lead of the multimeter to the positive terminal of the battery and the negative (black) lead to the negative terminal.
A healthy battery should have a voltage reading of approximately 12.6 volts. If the voltage reading is significantly lower than 12.6 volts, it may indicate a weak or discharged battery. In this case, try charging the battery using a charger to see if the voltage increases.
Step 2: Inspecting The Alternator Belt

The alternator belt plays a vital role in transferring power from the engine to the alternator, ensuring the proper charging of the battery. Any issues with the belt can significantly affect the alternator’s performance and lead to a malfunctioning charging system.
To begin the inspection, first, ensure the engine is turned off, and the key is removed from the ignition. Locate the alternator, which is typically situated on the side of the engine and connected to various components such as the battery and the drive belt system.
Carefully examine the alternator belt for signs of fraying, cracking, or excessive looseness. A worn-out belt may display visible signs of damage, such as cracks or missing chunks of rubber.
Step 3: Testing The Voltage Regulator

Once you have identified a potential alternator fault, it is crucial to test the voltage regulator to determine if it is functioning properly. The voltage regulator plays a vital role in regulating the alternator’s output voltage, ensuring that it remains within the acceptable range for optimal operation of electrical components in the vehicle.
To test the voltage regulator, you will need a digital multimeter. Start by ensuring that the engine is turned off and all electrical accessories are switched off. Locate the voltage regulator, often mounted on or near the alternator.
Carefully disconnect the electrical connectors attached to the voltage regulator. Next, set your multimeter to the DC voltage setting and connect the positive (red) lead to the battery’s positive terminal. Then, connect the negative (black) lead to the voltage regulator’s output terminal. This terminal is usually marked as “B+” or “BAT.”
Step 4: Examining The Wiring And Connections

Once you have identified a fault with the alternator and ruled out any issues with the battery and belt, it’s time to focus on examining the wiring and connections. This step is crucial as faulty or loose connections often cause alternator problems.
Begin by visually inspecting all the wiring harnesses and cables connected to the alternator. Look for any signs of damage, such as frayed wires or loose connections. If you spot any issues, it’s important to address them immediately. Next, carefully examine the alternator’s connectors.
Check for any signs of corrosion, rust, or loose pins. Corrosion can interfere with the electrical flow and cause the alternator to malfunction. If you notice any corrosion, use a wire brush or sandpaper to clean the connectors thoroughly.
Step 5: Replacing The Alternator

Replacing the alternator is a crucial step in troubleshooting and repairing the alternator fault. Once you have identified that the alternator is the problem’s source, it is time to proceed with the replacement process. Before you begin, ensure you have the necessary tools and equipment ready.
This may include a wrench or socket set, a screwdriver, and a belt tensioner tool. It is also recommended to have a replacement alternator on hand. Disconnect the negative battery cable to ensure safety while working on the electrical components.
Once this is done, locate the alternator and identify the mounting bolts that secure it in place. Use the appropriate tools to loosen and remove these bolts, carefully keeping track of each one.
Once the mounting bolts are removed, gently detach the electrical connectors from the alternator. These connectors may include the main power wire, the voltage regulator connector, and any other wiring specific to your vehicle’s make
Preventive Maintenance Tips For Avoiding Alternator Faults
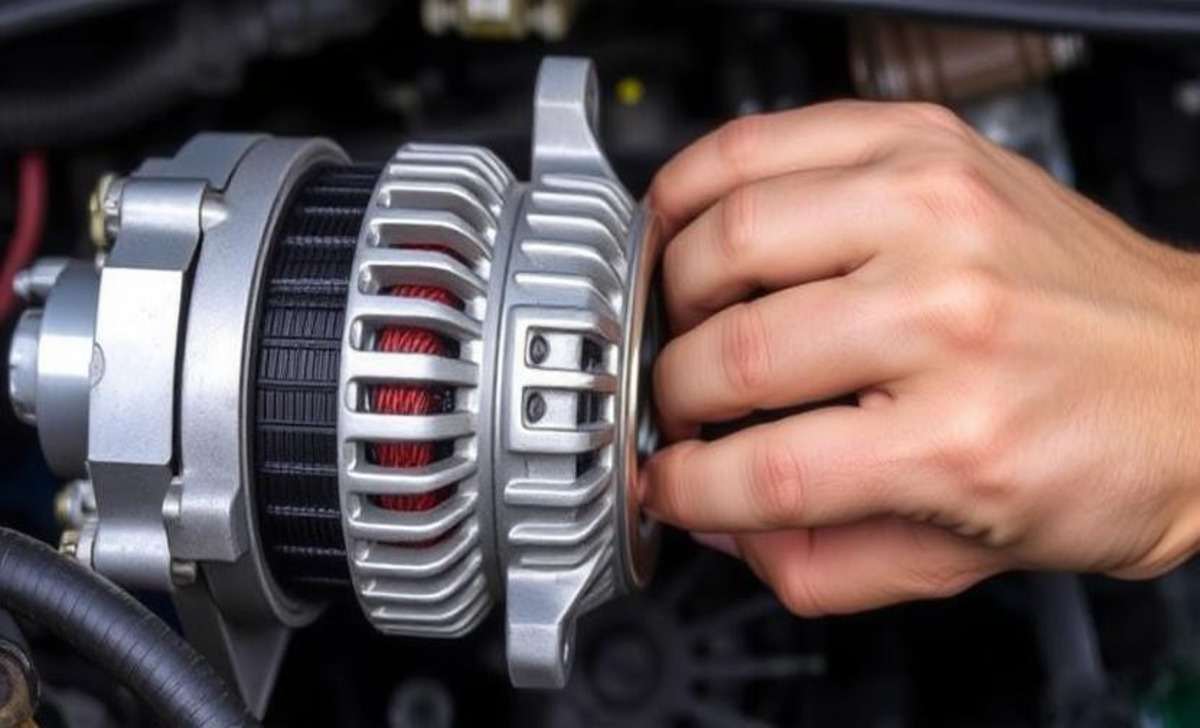
- Regularly Inspect And Clean The Alternator: Dust, dirt, and debris can accumulate on the alternator, affecting its performance. Clean it regularly to prevent any build-up that may lead to faults.
- Check The Belt Tension: The alternator is driven by a belt connected to the engine. Ensure that the belt is properly tensioned to avoid slipping or excessive wear, which can cause alternator faults.
- Inspect The Wiring And Connections: Loose or corroded connections can hinder the flow of electricity from the alternator to the battery. Regularly check the wiring and connections to ensure they are secure and clean.
- Monitor The Battery Condition: A weak or faulty battery can put additional strain on the alternator, potentially leading to faults. Test your battery regularly and replace it if necessary to prevent any issues.
Steps To Follow To Test The Charging System In An Audi
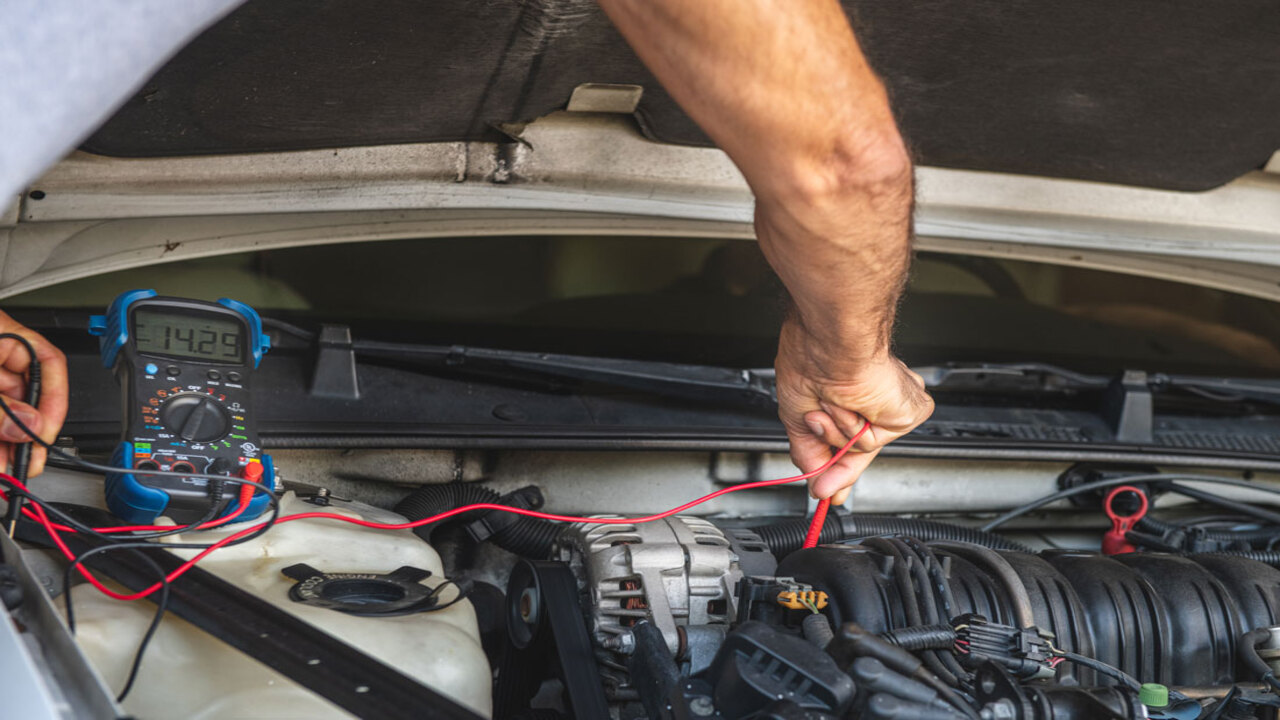
- Visual Inspection:
- Check the battery terminals for corrosion or loose connections. Clean and tighten them if necessary.
- Inspect the alternator belt for wear or damage.
- Battery Voltage Check:
- A multimeter measures the battery voltage. With the engine off, it should read around 12.6 volts.
- Start the engine and measure the voltage again. It should be between 13.7 and 14.7 volts, indicating proper charging.
- Load Test:
- Turn on electrical accessories such as headlights, air conditioning, and radio to add load.
- Check the battery voltage with the engine running and accessories on. It should remain above 13 volts.
- Alternator Output Test:
- Connect the multimeter to the battery terminals.
- Increase the engine RPM to around 2000. The voltage should remain steady between 13.7 and 14.7 volts.
- Listen for unusual noises from the alternator, which could indicate internal issues.
- Check for Warning Lights:
- Observe the dashboard for any warning lights, such as the yellow battery light, which could indicate a charging system issue.
- Professional Diagnostic:
- If the above tests are inconclusive, consult a professional mechanic for a thorough diagnostic using specialized equipment.
What Are The Effects Of A Faulty AUDI Alternator On The Battery?
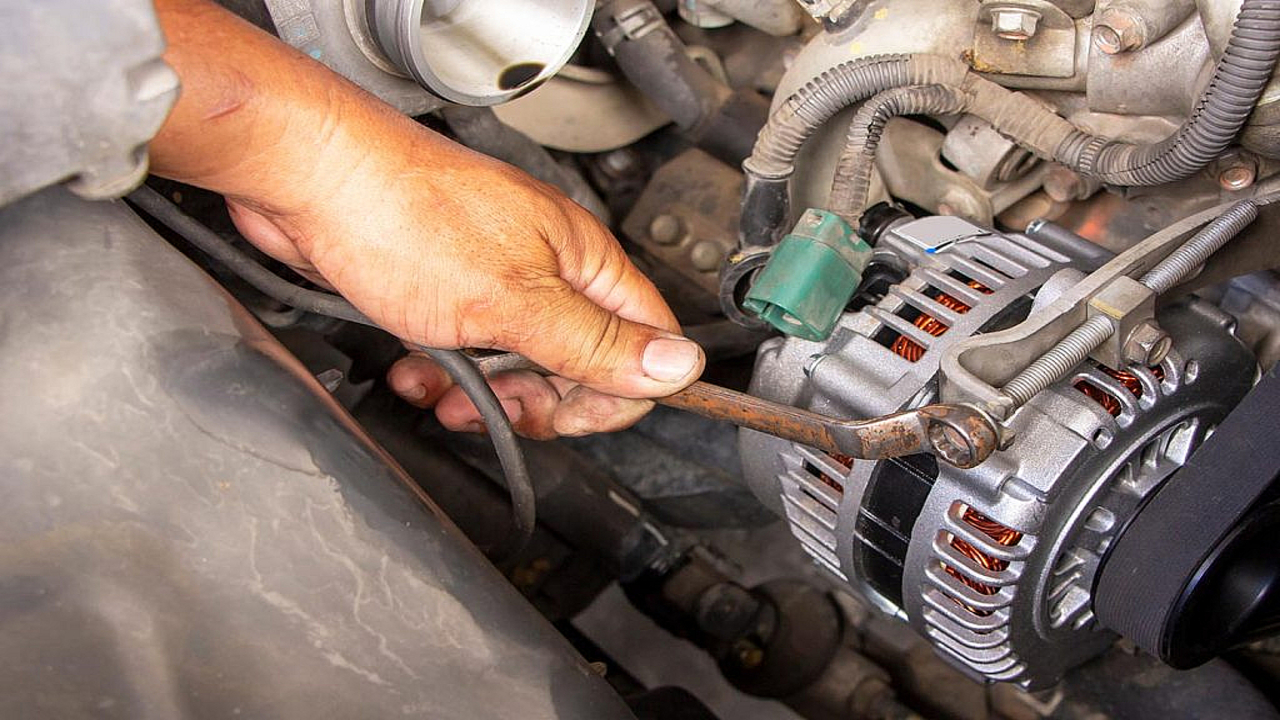
- Insufficient charging: Faulty alternator leads to decreased battery power.
- Diminished battery life: Continuous undercharging shortens battery lifespan.
- Electrical issues: Low battery power causes malfunctions in electrical components.
- Difficulty starting: Weak battery results in starting difficulties.
Without sufficient charging, the battery struggles to power essential systems. This includes the car’s entertainment system. As a result, dashboard warning lights may appear for the parking brake or other systems.
What Are The Causes Of An Overcharged Battery In An Audi?

A faulty Audi alternator significantly impacts the battery’s performance and overall vehicle functionality. When the alternator problem arises, it fails to charge the battery effectively, leading to frequent battery drain.
This can weaken the battery connection, making it difficult to start the car. Additionally, a malfunctioning alternator pulley may exacerbate the issue, causing inconsistent power delivery. The causes of an overcharged battery in an Audi can be multifaceted, often involving mechanical and electrical components.
Here are the common causes:
- Faulty Voltage Regulator: A malfunctioning voltage regulator can cause the alternator to overcharge the car battery, leading to excessive battery voltage. This component is crucial for maintaining a stable charge.
- Alternator Issues: Problems with the alternator, such as a damaged alternator pulley or internal faults, can lead to irregular charging and overcharging of the battery.
- Worn Serpentine Belt: If the serpentine belt is worn or slipping, it can cause the alternator to function improperly, potentially leading to overcharging.
- Warning Light: The battery warning light on the dashboard may illuminate if there is an issue with the charging system, including overcharging.
- Strange Noises: Unusual noises from the engine bay can indicate problems with the alternator or serpentine belt, which might be causing the overcharge.
- Sensor Malfunction: Sensors that monitor battery voltage can fail, causing the system to misread the battery’s charge level and lead to overcharging.
Audi AG recommends regular maintenance to detect these issues early. Platforms like Fora can provide additional insights and troubleshooting tips from other Audi owners. If you suspect overcharging, consult a professional mechanic to promptly inspect and address the issue.
What Are The Warning Signs Of A Failing Audi Alternator?
- Battery Light: One of the first warning signs of a failing alternator is the illumination of the battery light on your dashboard. This indicates an issue with the charging system, specifically the alternator.
- Dim Lights: Headlights and interior lights may dim or flicker as a failing alternator struggles to provide consistent power to the vehicle’s electrical systems.
- Electrical Issues: Accessories such as power windows, radio, or air conditioning may malfunction due to insufficient power from a failing alternator.
- Fault Codes: Diagnostic scans may reveal fault codes related to the charging system or the alternator, providing further evidence of an issue.
- Dead Battery: If your battery frequently dies or fails to hold a charge, it could be due to an Audi alternator fault battery not charging effectively.
- Unusual Noises: A failing alternator may produce unusual sounds like grinding or whining, indicating internal component issues.
- Burning Smell: Overheating alternators can emit a burning smell, often due to overworked or failing components.
- Engine Stalling: Inadequate power supply from the alternator can lead to engine stalling or difficulties starting the vehicle.
If you experience these warning signs, it’s crucial to have your alternator inspected and, if necessary, replaced with a new alternator to ensure your vehicle’s reliability.
Conclusion
The “Audi “alternator fault battery not charging” issue with Audi vehicles is a common and potentially serious problem for owners. While it may seem daunting and costly to fix, it is important to address the issue promptly to avoid further damage and ensure the safety and longevity of your vehicle.
It can be frustrating and costly, but addressing the issue promptly is crucial to prevent further vehicle damage. Seek professional help from a trusted mechanic or dealership. They have the expertise and tools to diagnose and repair the issue properly. With proper maintenance, your Audi will provide reliable and enjoyable driving experiences.
FAQs
1.How Do You Reset The Check Engine Light After Changing The Battery?
To reset the check engine light after changing the battery, disconnect the car battery’s negative terminal, wait for at least 15 minutes, and reconnect it.
Alternatively, you can use an OBD-II scanner to clear the error code causing the check engine light to come on. Make sure the underlying issue has been resolved before resetting the light to prevent it from coming back on.
2.How To Determine If The Battery Or The Alternator Is The Issue In An Audi?
To determine if the battery or alternator is the issue in your Audi model, check the dashboard warning light for the battery. If the light stays on after starting, it often indicates an alternator problem.
Test the battery by turning on a light bulb or the car’s headlights; dim lights suggest a weak battery. Additionally, the alternator might be faulty if you recently replaced brake pads or other car parts and still face issues. Consult a professional mechanic for a thorough diagnosis.
3.Why Is The Battery Not Charging Even If The Alternator Is Okay?
If the battery isn’t charging despite the alternator being okay, it could be due to a poor battery terminal connection. Corroded or loose terminals prevent proper current flow. Additionally, worn-out car batteries may fail to charge even with a functioning alternator.
The yellow battery light on the dashboard might still illuminate due to these issues. Alternator failure isn’t the only cause; issues with the transmission or other electrical components can also impact charging.
4.Can You Drive With An Alternator Fault Battery Not Charging?
It is possible to drive with an alternator fault and a battery that is not charging, but it is not recommended. Driving under these conditions can result in the battery losing charge quickly, leading to eventual stalling of the vehicle.
It is best to address the alternator fault and charging issue immediately to avoid being stranded on the road.
5.Can A Bad Alternator Cause Transmission Problems In A Manual Car?
No, a bad alternator is not likely to cause transmission problems in a manual car, as the alternator is responsible for charging the battery and providing power to the electrical components.
In contrast, the transmission transfers power from the engine to the wheels. However, electrical issues caused by a bad alternator could indirectly impact the transmission’s performance.
6.What Does “Alternator Fault Battery Not Charging” Mean?
This message indicates a problem in your Audi’s electrical system where the alternator isn’t charging the battery as required. This may stem from alternator trouble, a bad battery, or issues with the engine management system, leading to power loss for essential functions like rear lights and other electronics.
7.Why Does My Audi Say “Battery Not Charging”?
Your Audi may display this warning due to alternator issues, such as a malfunctioning voltage regulator, worn-out components, or poor belt tension. Faults in the engine control unit or wiring can also disrupt the connection between the alternator and the battery, triggering the battery warning light or electrical system malfunction light in models like the Audi A3 or Audi A4.
8.What Causes The Alternator To Not charge The Battery?
Common causes include a bad battery, Audi alternator failure, damaged or loose belts, corroded connections, or a malfunctioning engine control unit. These factors prevent the alternator from supplying sufficient power to the battery, affecting overall engine performance and your Audi vehicle’s reliability.